To match your high-resolution video footage or fit the high-definition TV, you may need to learn how to upscale video and increase the visual quality of your old and low-resolution video. Some may quit in the first step or think upscaling video is complex work. However, you will find a suitable solution below in this article targeted at both professionals and amateurs. With the detailed steps on how to upscale video, you will master this skill within minutes. Without further ado, move along to see more.
Easiest Solution on How to Upscale Video
You will learn the easiest way to upscale video to higher resolutions like 1080p, 4K, etc. Try Aiseesoft Video Converter Ultimate on your device. With its AI technology, this reliable program will perfectly increase your video to a higher level. The best part about this Video Converter Ultimate is that you can excel in upscaling video even being an amateur.
Key Features:
- Choose multiple video resolutions to fit your screen.
- Upscale any part of your video with the trimming tool.
- Level up your video in resolution, audio, and picture frame.
- Preview the video before upscaling to ensure excellent quality.
How to Upscale Video with Aiseesoft Video Converter Ultimate
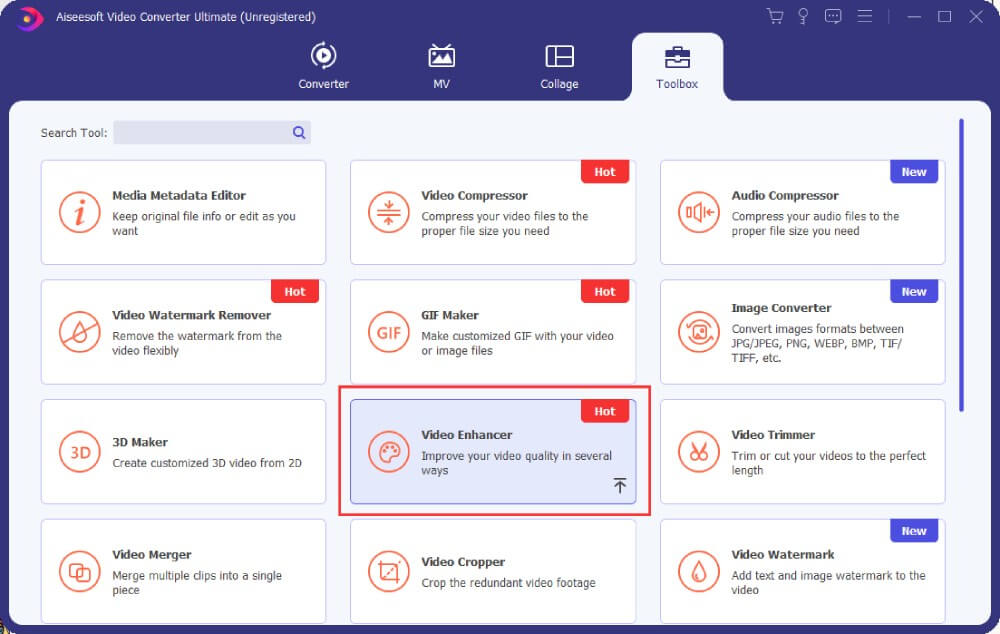
Step 1: Get a free download of the VideoConverter Ultimate from the official website. Install and launch it on your computer. Four buttons will show on the main interface. Click the Toolkit button. And then click the Video Enhancer button.
Step 2: Click the Plus icon on the center of the pop-up window and upload the video you want to upscale. Select a video from your file folder and click the Open button to import finally. You can change the video anytime by clicking the Change Source File button at the top.
Step 3: You need to click the checkbox on the UpscaleResolution section. Next, click the Enhance button to upscale the video. You may also click the Preview button to check the video before enhancing it. The upscaled video will show in the pop-up window.
Furthermore, its great file compatibility is also a highlight. For example, you can convert formats to a more popular one, like turning MKV to MP4. These formats are all acceptable on this converter.
How to Upscale Video Using Adobe
How to upscale video without looing broken? As the best video-editing tool in the world, Adobe Premiere Pro should be the answer for you. You will find it efficient to repair your low-resolution videos. Except it only supports video in MP4 format, other advanced features are still worth looking at. For example, in Premiere, you can take care of more details of the video. This is a valuable function, especially when you got a video with mixed resolutions to fix. Now, check the steps below on how to upscale video for better visual effects.
How to Upscale Video with Adobe Premiere Pro
Step 1: Launch the Premiere on your device andcreate a new project by clickingfile>New>Sequence.Choose an appropriate preset for your video. For example, if you want the output video to be 4K, choose the 4K preset with the same frame rate and aspect ratio as your video.
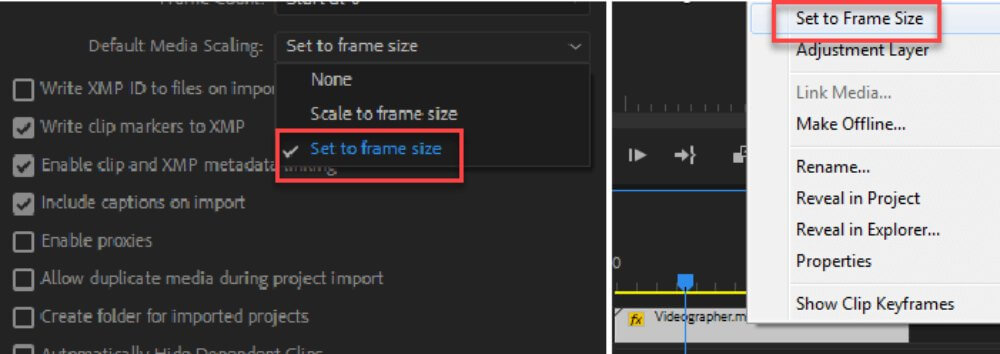
Step 2: After that, on the menu bar of Premiere, you need to click Edit>Preferences>Media. A window will pop up, then click the Default Media Scaling button and click the tick box before Set to Frame Size to enable.
Note: This step is very important, and you should not choose the Scale to frame size to upscale your video. Because if you downscale a 4K video to 1080P and try to zoom in, the Premiere will calculate pixels based on the low-resolution 1080P. And the picture will look bad.
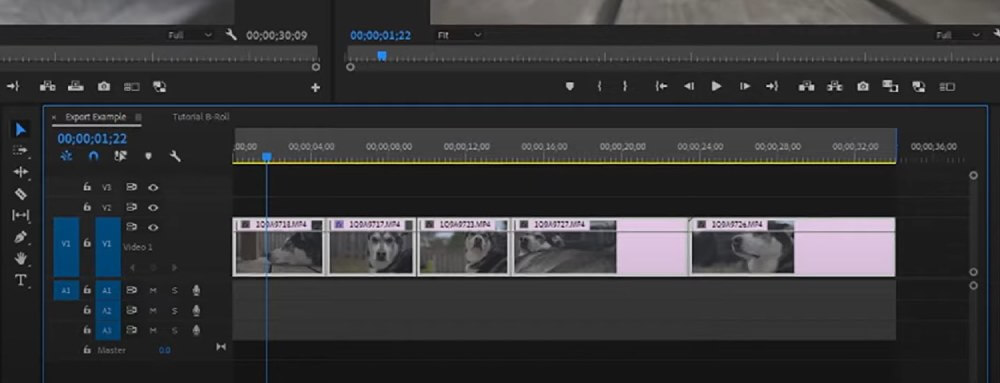
Step 3: Import your video. You can directly drag the video to the timeline. You can upscale several clips at the same time and combine them into one video. After dragging, you will see there are black spaces surrounding your video.
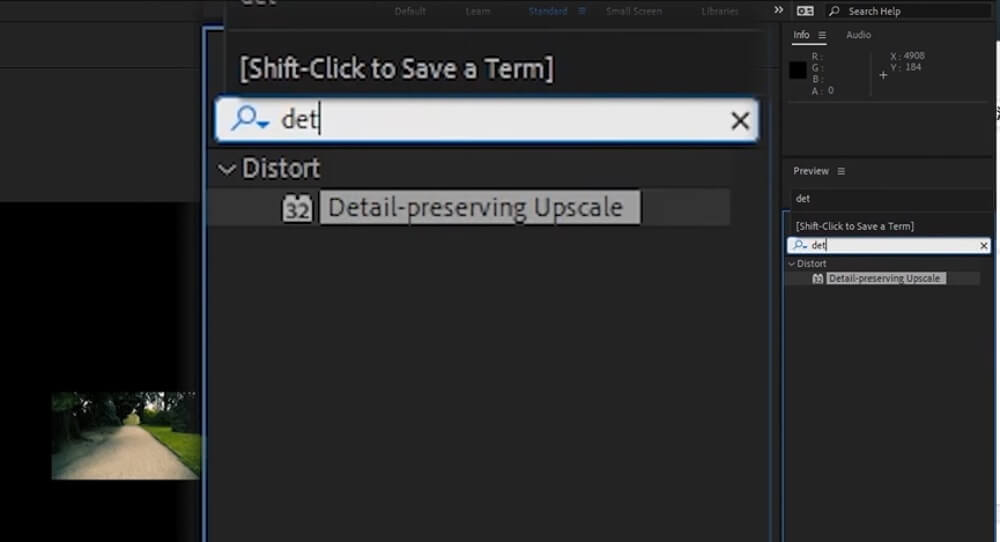
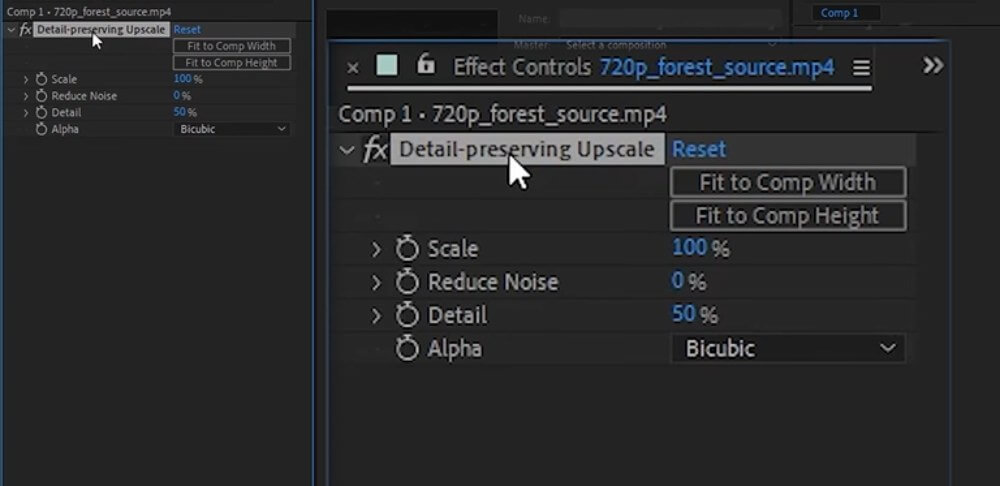
Step 4: Add the upscaling effects to your video. In this way, the AI will take care of the video details for you. In the Effects & Presets panel, search for Detail-preserving Upscale. You can drag the effect to the timeline to apply it to your video.
Step 5: On the left side, there is the Effect Controls panel. Click the Fit to Comp Width button, and your old video will match the scale of your 4K preset. You can also tweak some details via the Scale and Detail slider bars.
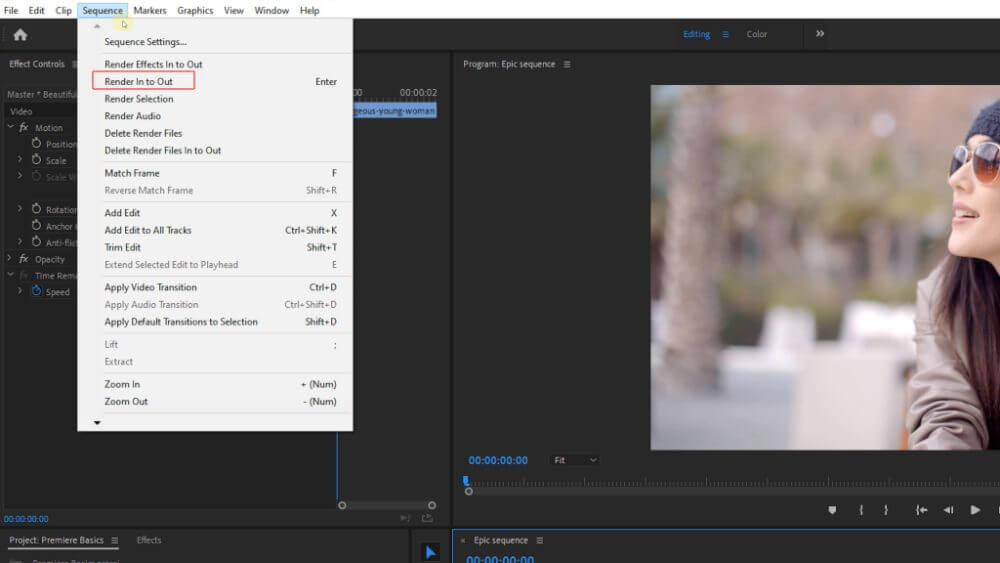
Step 6: Now, you are all done. Save your project and click Sequence>Render In to Out.After the rendering, you can export the final video with a higher resolution.
Tip: Simply creating a 4K timeline for a 1080P video will not make it work. If you import a 1080P video and stretch it to fit the 4K canvas, lots of details will lose during that process, and the result will be bad. Besides, you can save the above-mentioned method as a template for upscaling videos in PremierePro. Next time, you just need to adjust a little.
Conclusion
To wrap up, this article gives a detailed tutorial on upscaling video for higher resolution. Whether you are a professional video editor or an amateur, you all can find a preferable solution above. Meanwhile, you can use these methods to repair your old videos, increase video resolution to match high-definition devices, or just simply obtain a smooth playback.
